Introduction: The Magic of Homemade Sweetened Condensed Milk
Homemade Sweetened Condensed Milk is one of those timeless kitchen essentials that every home cook should have in their recipe collection. Known for its rich, velvety texture and deep sweetness, condensed milk is used in countless desserts around the world—from creamy pies and fudgy brownies to ice creams, cakes, custards, and classic beverages like Thai iced tea or Brazilian brigadeiros. While the store-bought version is convenient, making it at home gives you something even better: a fresher, creamier, more flavorful result free from additives and preservatives.
This recipe uses simple pantry staples—powdered milk, sugar, melted butter, and boiling water—to create a perfectly smooth, glossy, thick condensed milk in just minutes. Whether you’re making it for an emergency baking situation or simply prefer homemade alternatives, this recipe guarantees consistent, delicious results every time. With only four ingredients, no special equipment besides a blender, and a total time of under 10 minutes, it’s a must-try for any cooking enthusiast.
2. Why This Recipe Works
Many homemade condensed milk recipes require long stovetop cooking, constant stirring, and careful monitoring to prevent burning or crystallization. This recipe, however, works exceptionally well because it uses a smart combination of ingredients and technique:
⭐ Powdered Milk Replaces Evaporation
Traditional condensed milk is made by heating fresh milk until most of its water evaporates. Powdered milk achieves the same concentration instantly without cooking.
⭐ Granulated Sugar Dissolves Easily
Boiling water helps dissolve the sugar completely, ensuring a smooth, syrupy texture without graininess.
⭐ Melted Butter Adds Fat and Richness
Condensed milk needs enough fat to feel silky and luxurious. Butter provides that creamy mouthfeel you expect from store-bought versions.
⭐ The Blender Creates a Perfect Emulsion
Blending for 2–3 minutes fully incorporates the ingredients, creating a uniform, glossy mixture that thickens as it cools.
⭐ No Cooking, No Fuss
You avoid scorching, over-thickening, or uneven texture—common issues with stovetop versions.
This recipe is fast, reliable, and delivers the perfect consistency every time.
3. What You’ll Need for This Recipe
One of the best things about this recipe is its simplicity. You don’t need fancy tools or complicated ingredients—just common pantry staples.
Ingredients
1 cup powdered milk – Choose whole milk powder for the richest flavor.
2/3 cup granulated sugar – Provides sweetness and thickens the final product.
1/3 cup boiling water – Helps dissolve sugar and activates the blending process.
3 tablespoons melted butter – Adds richness, creaminess, and smooth texture.
Equipment
Blender – A regular blender works perfectly; stand or immersion blenders are fine.
Heatproof measuring cup – For boiling water.
Clean, sterilized glass jars – For storage.
Rubber spatula – For scraping down the sides.
4. Title 4: The Science Behind Homemade Condensed Milk
Understanding the technique helps ensure success:
Milk powder contains concentrated milk solids, which create thickness.
Sugar increases viscosity and prevents spoilage by lowering water activity.
Butter adds fat, which makes the condensed milk creamy instead of watery.
Boiling water dissolves everything, eliminating granular texture.
Blending emulsifies the mixture, preventing separation.
This balance of sugar + fat + milk solids is exactly what makes condensed milk irresistible.
5. How to Make Homemade Sweetened Condensed Milk (Step-by-Step Guide)
Follow these easy steps for perfect results:
Step 1: Add All Ingredients to the Blender
Place the powdered milk, sugar, boiling water, and melted butter into your blender. Work quickly so the water stays hot.
Step 2: Blend on High
Blend the mixture for about 2–3 minutes.
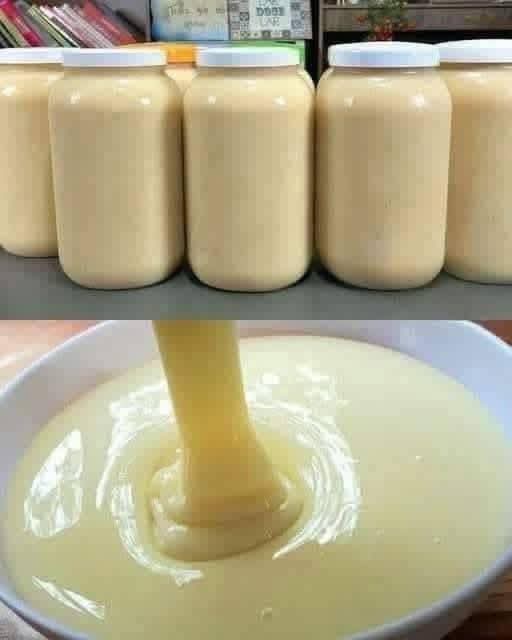
You should see:
A smooth, creamy texture
A glossy surface
No visible grains of sugar
A slightly thin consistency (it thickens as it cools)
Step 3: Transfer and Cool
Pour the mixture into sterilized glass jars.
Allow it to cool completely at room temperature.
You will notice it thickening beautifully as it cools.
Step 4: Store
Seal the jars and refrigerate.
Your homemade condensed milk will stay fresh for up to 2 weeks.
6. Tips + Tricks for Recipe Success
🔹 Use Whole Milk Powder
Skim milk powder works, but whole milk powder gives a richer, more authentic flavor.
🔹 Blend Long Enough
Under-blending can cause graininess. Two to three minutes is perfect.
🔹 Use Fresh, Hot Boiling Water
Hot water dissolves the sugar and helps activate the emulsification.
🔹 Cool Before Storing
Don’t seal warm jars; this can cause condensation and spoilage.
🔹 Adjust Thickness if Needed
Too thick? Add 1 tablespoon hot water at a time.
Too thin? Blend with 1–2 tablespoons extra powdered milk.
🔹 Avoid Overfilling the Blender
This allows proper blending and avoids spills.
7. Title 7: Variations and Flavor Ideas
You can customize this recipe to fit different desserts or cultural recipes.
⭐ Vanilla Condensed Milk
Add 1 teaspoon vanilla extract after blending.
⭐ Caramel-Style Condensed Milk
Blend in 1 tablespoon brown sugar or a drizzle of caramel.
⭐ Coconut Condensed Milk
Replace butter with coconut oil for a tropical twist.
⭐ Chocolate Condensed Milk
Add 2 tablespoons cocoa powder.
⭐ Vegan Version
Use coconut milk powder, coconut oil, and increase sugar slightly.
8. Title 8: Common Mistakes & How to Avoid Them
❌ Grainy texture
➡ Blend longer or ensure water is boiling hot.
❌ Too runny
➡ Add more powdered milk and blend again.
❌ Too thick
➡ Add small amounts of hot water until smooth.
❌ Separation
➡ Shake the jar or re-blend for 30 seconds.
9. How to Use Homemade Sweetened Condensed Milk
This ingredient is versatile and can be used for hundreds of recipes. Some popular uses include:
Fudge and truffles
Tres leches cake
Key lime pie
No-churn ice cream
Caramel sauces
Coffee or tea sweetener
Dessert toppings
Fruit salads
Cheesecakes
Brigadeiros
Pudding and custards
Its creamy sweetness enhances both baked and no-bake recipes.
10. Title 10: Serving Suggestions
Even though condensed milk isn’t usually served on its own, there are many ways to enjoy it:
🍓 Drizzle over fresh fruit
Strawberries, bananas, or mangoes pair beautifully with it.
☕ Stir into beverages
Vietnamese iced coffee, chai, bubble tea, or hot cocoa.
🍰 Use as a topping for cakes and pancakes
Adds instant moisture and shine.
🍞 Spread on toast or crepes
A classic treat in many cultures.
🥥 Combine with coconut flakes
Makes a quick dessert snack.
11. Title 11: How to Serve
When serving condensed milk in recipes:
Bring it to room temperature for easier mixing
Stir before using if it has settled
Use a small spoon or squeeze bottle for neat drizzling
Warm it slightly if you want a thinner consistency
In baking, measure using a liquid measuring cup for accuracy.
12. Storage, Shelf Life, and Freezing Guide
📌 Refrigerator:
Store in sterilized jars for up to 14 days.
📌 Freezer:
Yes, you can freeze it!
Portion into airtight containers and freeze for up to 3 months.
Thaw at room temperature and blend if needed.
📌 Signs of Spoilage:
Sour smell
Mold
Separation that doesn’t blend back
Off flavor
Always use clean spoons to avoid contamination.
13. Title 13: Frequently Asked Questions (FAQ)
Can I use fresh milk instead of powdered milk?
Not for this quick recipe. Fresh milk requires evaporation and cooking.
Can I reduce the sugar?
Not recommended—sugar helps thicken and preserve the mixture.
Is this the same as evaporated milk?
No. Evaporated milk is unsweetened and less thick.
Can I use a hand mixer instead of a blender?
A blender works best, but a strong immersion blender can work too.
Why is my condensed milk gritty?
Either the sugar didn’t dissolve completely or blending time was too short.
14. Time Required (Prep, Cook, Total)
Prep Time: 5 minutes
Blending Time: 2–3 minutes
Cooling Time: 10–15 minutes
Total Time: About 20 minutes
This is one of the fastest homemade ingredient recipes you’ll ever make.
Conclusion: Your New Go-To Homemade Condensed Milk
With just four simple ingredients and a blender, you can create rich, creamy, luxurious sweetened condensed milk at home anytime. It tastes fresher than store-bought versions, saves money, and gives you complete control over flavor and texture. Whether you’re baking, making desserts, or preparing sweet beverages, this recipe will quickly become a staple in your kitchen.