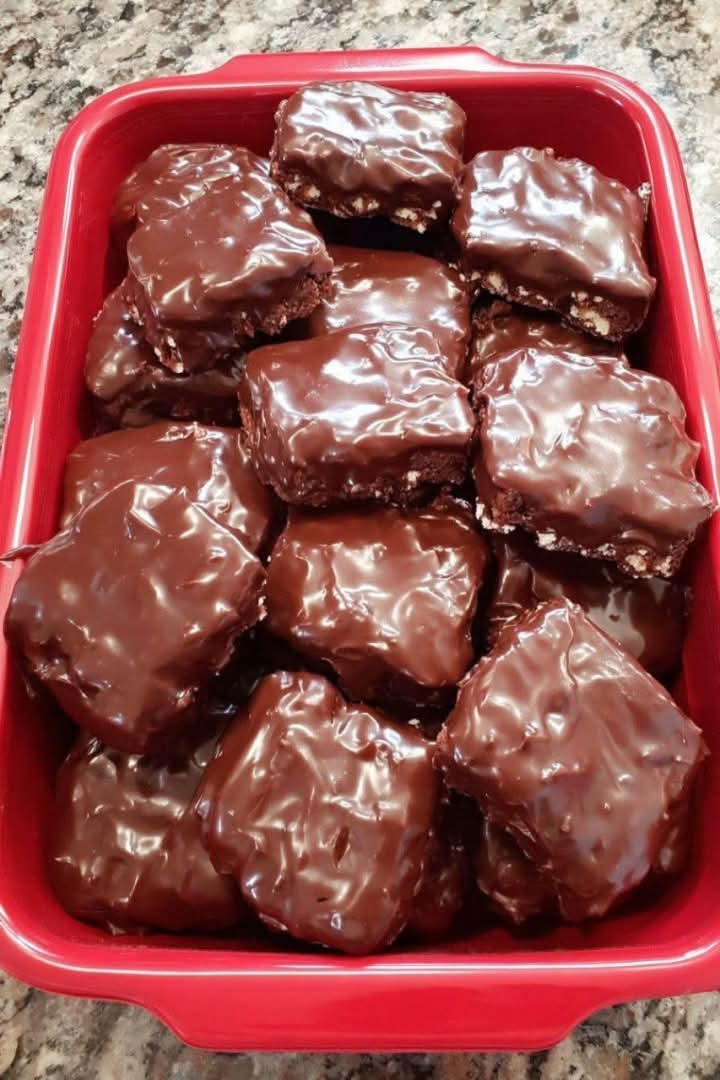
CHOCOLATE-COVERED BROWNIE BARS INTRODUCTION
Chocolate-Covered Brownie Bars are the ultimate treat for anyone who loves rich, fudgy brownies dipped in a silky layer of melted chocolate.
They bring together the dense chewiness of homemade brownies and the glossy snap of a chocolate coating, turning a simple baked good into a bakery-style confection.
These bars are perfect for parties, special occasions, lunchbox snacks, or anytime you want to impress without needing advanced baking skills. What makes them truly irresistible is how incredibly easy they are to customize—add nuts, swirl in extra chocolate, sprinkle the tops, or dip them halfway for a professional finish.
Whether you’re a beginner baker or a seasoned home cook, this recipe gives you a dessert that tastes luxurious but is surprisingly simple to prepare.
WHY THIS RECIPE WORKS
This recipe works beautifully because it balances texture, flavor, and technique without unnecessary complexity. The brownie base is intentionally designed to be fudgy rather than cakey by using a higher ratio of fat and sugar to flour.
The melted butter contributes richness, while the cocoa powder deepens the chocolate flavor without making the batter too heavy. Adding optional chocolate chips or chopped nuts enhances both flavor and texture.
The chocolate coating adds a professional touch while also extending the shelf life of the brownies by sealing in moisture. Using semi-sweet or dark chocolate ensures the final dessert isn’t overwhelmingly sweet.
A splash of coconut oil helps create a smoother, more fluid dipping chocolate that sets beautifully with a soft, glossy sheen. All of these elements work together to deliver a consistent result every time: crisp chocolate outside, decadent brownie inside.
WHAT YOU’LL NEED FOR THIS RECIPE
Making Chocolate-Covered Brownie Bars requires simple pantry ingredients and basic tools you probably already own. Here is everything you’ll need:
Fudgy Brownies
Unsalted butter
Granulated sugar
Eggs
Vanilla extract
All-purpose flour
Cocoa powder
Salt
Optional: chocolate chips or chopped nuts
Chocolate Coating
Semi-sweet or dark chocolate
Coconut oil (optional, for smoother dipping)
Tools
Mixing bowl
Whisk and spatula
8×8 or 9×9-inch baking pan
Parchment paper
Double boiler or microwave-safe bowl
Cutting knife
Dipping fork or regular fork
These basic tools and ingredients work together effortlessly to build a dessert that tastes high-end but doesn’t require professional equipment. Even the dipping process is manageable with just a fork and a lined tray.
HOW TO MAKE THIS RECIPE
1. Prepare the Brownie Batter
Start by melting the unsalted butter until smooth and warm, then whisk in the granulated sugar until the mixture becomes glossy. This helps the sugar dissolve properly, giving the brownies that signature chewy texture.
Add the eggs and vanilla extract, whisking until smooth and well combined. In a separate bowl, sift together the flour, cocoa powder, and salt. Fold the dry mixture into the wet ingredients using a spatula. If you’re using add-ins such as chocolate chips or nuts, stir them in at this stage.
2. Bake the Brownies
Line your baking pan with parchment paper to ensure clean removal later. Spread the brownie batter evenly and smooth the top. Bake at 350°F (175°C) for 20–25 minutes, depending on your oven and pan size.
The brownies should be set around the edges but slightly soft in the center. Allow them to cool completely in the pan—this step is essential for clean cutting.
3. Cut the Brownies Into Bars
Once the brownies are fully cooled or slightly chilled, lift them out using the parchment paper. Using a sharp knife, cut them into equal-size bars, squares, or rectangles.
Chilling the brownies for 15–20 minutes makes this step easier and prevents crumbling.
4. Prepare the Chocolate Coating
Melt the semi-sweet or dark chocolate over a double boiler or microwave it in short intervals, stirring frequently.
Add a small amount of coconut oil to create a silky, smooth dipping chocolate that sets beautifully and isn’t too thick.
5. Dip the Brownie Bars
Using a dipping fork or a regular fork, lower each brownie bar into the melted chocolate, ensuring all sides are coated. Lift the bar and tap gently to release excess chocolate. Place the dipped bars on a parchment-lined tray.
6. Let the Chocolate Set
Leave the chocolate-covered brownies at room temperature until firm, or chill them for 10–15 minutes to speed up the process. Once set, the bars are ready to enjoy.
TIPS + TRICKS & MORE FOR RECIPE SUCCESS
Use room-temperature eggs to help the batter blend more easily and prevent overmixing.
Don’t overbake—fudgy brownies rely on slightly underbaked centers.
Chill before cutting for cleaner, sharper edges.
Use quality chocolate for the coating because the flavor shines through.
Add coconut oil to create a smoother dip that’s easier to work with.
Work in batches when dipping so the chocolate doesn’t cool too quickly.
Decorate immediately if adding sprinkles or chopped nuts on top—these adhere best before the chocolate sets.
Store properly by keeping bars in an airtight container to prevent the chocolate from sweating.
Freeze uncoated brownies for long-term storage and dip later when needed.
Use parchment paper under dipped bars for easy cleanup.
Avoid watery add-ins which may cause chocolate seizing.
Warm your knife under hot water for perfect cutting lines.
Choose the right tray size—smaller pans create thicker brownies that dip more easily.
Stir gently to avoid introducing air bubbles into the chocolate coating.
HOW TO SERVE
Chocolate-Covered Brownie Bars can be served chilled for a firmer bite or at room temperature for a softer interior. They look elegant on dessert platters, after-school snack plates, or party treat boards.
Arrange them neatly in rows, dust lightly with cocoa powder if undecorated, or serve alongside whipped cream or fresh berries. These bars also pack and travel well, making them ideal for gifting or sharing.
SERVING SUGGESTIONS
Party Dessert Platter: Pair with strawberries, cookies, and marshmallows.
Lunchbox Treat: Wrap individually in parchment squares for easy packing.
Holiday Treat Bags: Add festive sprinkles before the chocolate sets.
Ice Cream Topping: Chop into pieces and use as a rich topping.
Coffee or Tea Pairing: Serve with espresso for a café-style experience.
After-Dinner Dessert: Plate with a drizzle of caramel or chocolate sauce.
Gift Boxes: Line a tin with tissue paper and arrange the bars inside.
TIME REQUIRED
Prep Time: 15–20 minutes
Bake Time: 20–25 minutes
Cooling Time: 1 hour (or 20–30 minutes if chilled)
Dipping + Setting Time: 20–30 minutes
Total Time: About 2 hours from start to finish
(Hands-on time is about 40–45 minutes.)