Creamed Chipped Beef Cheese Ball: A Classic Retro Appetizer Everyone Loves
Few appetizers have stood the test of time quite like the Creamed Chipped Beef Cheese Ball. This retro favorite has been gracing holiday tables, potlucks, game days, and family gatherings for decades—and for good reason.
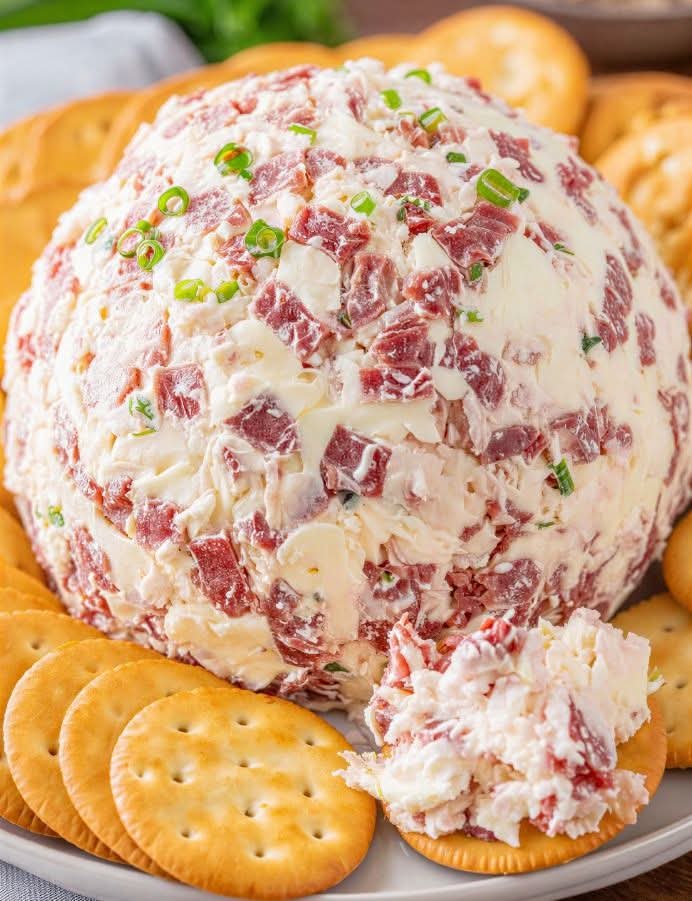
It’s creamy, savory, salty, and irresistibly spreadable, making it the kind of dish people hover around until every last crumb is gone. With simple ingredients and minimal effort, this cheese ball delivers big flavor and nostalgic comfort in every bite.
Whether you remember it from childhood parties or you’re discovering it for the first time, this recipe is one that never goes out of style.
Why This Recipe Works So Well Every Single Time
This recipe works because it balances rich creaminess with salty, umami-packed flavor. The cream cheese provides a smooth, luxurious base, while chipped dried beef brings that signature savory punch.
Worcestershire sauce adds depth and a subtle tang, and the garlic and onion powders round everything out without overpowering the dish.
Green onions add freshness and a slight bite that cuts through the richness.
Best of all, the recipe requires no cooking, no baking, and no complicated steps—just mix, shape, chill, and serve.
A Beloved Make-Ahead Appetizer for Any Occasion
One of the biggest reasons this cheese ball remains so popular is its make-ahead convenience. You can prepare it hours—or even a day—in advance, which makes it perfect for busy hosts.
It actually tastes better after chilling, as the flavors have time to meld together. Whether you’re hosting a holiday dinner, bringing something to a potluck, or setting out snacks for game night, this recipe takes the stress out of entertaining.
What You’ll Need For This Recipe (Ingredients Breakdown)
This Creamed Chipped Beef Cheese Ball uses pantry staples and easy-to-find ingredients. Here’s what makes each component important:
Cream Cheese (2 packages, 8 oz. each): The foundation of the recipe. Make sure it’s fully softened so everything mixes smoothly.
Chipped Dried Beef (8 oz.): Finely chopped for even distribution and easier spreading. This provides the signature salty flavor.
Worcestershire Sauce: Adds depth, umami, and a subtle tang that enhances the beef and cheese.
Garlic Powder & Onion Powder: These seasonings boost flavor without adding moisture.
Green Onions: Freshness, color, and mild onion flavor that balances the richness.
Salt: Optional and added only after tasting, since chipped beef is already salty.
Ritz Crackers: Buttery and sturdy, perfect for scooping and spreading.
Choosing the Best Cream Cheese for a Smooth Texture
For the creamiest cheese ball, always use full-fat block cream cheese—not whipped or spreadable varieties. Let it sit at room temperature for at least 30 minutes before mixing. Softened cream cheese blends easily and creates a smooth, cohesive texture without lumps. If the cream cheese is too cold, the mixture can become uneven and harder to shape.
Preparing the Chipped Beef the Right Way
Chipped dried beef often comes in thin slices that need a little prep. Finely chopping it ensures that every bite has balanced flavor without large, chewy pieces.
If the beef is extremely salty, you can briefly rinse it under cold water and pat it dry before chopping. This step is optional but helpful for those sensitive to salt.
How To Make This Creamed Chipped Beef Cheese Ball
Start by placing the softened cream cheese into a large mixing bowl. Using a hand mixer or sturdy wooden spoon, mix until smooth and creamy.
Add the finely chopped chipped beef and green onions, mixing until evenly distributed. Next, stir in the Worcestershire sauce, garlic powder, and onion powder.
At this stage, taste the mixture and decide if additional salt is needed—often it isn’t.
Once everything is fully incorporated, transfer the mixture onto a sheet of plastic wrap, seal it tightly, and gently shape it into a ball.
Shaping, Wrapping, and Chilling for Best Results
Shaping the cheese ball is easier if the mixture is evenly mixed and soft but not warm. Use the plastic wrap to help form a smooth, round shape without sticking to your hands.
Once shaped, refrigerate for at least 20 minutes, though longer chilling will make it firmer and easier to serve.
Chilling also allows the flavors to fully develop, giving you a better-tasting appetizer.
Tips + Tricks & More For Recipe Success
For the best results, always taste before chilling and adjust seasoning as needed. Finely chopping the green onions prevents overpowering bites.
If you want extra visual appeal, roll the chilled cheese ball in chopped green onions or extra chopped beef before serving.
Keep it cold until just before serving, especially in warm environments, to maintain its shape and texture.
Flavor Variations You Can Easily Try
This classic recipe is delicious as written, but it’s also very adaptable. You can add a pinch of smoked paprika for warmth, a dash of hot sauce for heat, or finely chopped pecans around the outside for crunch.
Some people enjoy adding a little shredded cheddar or a spoonful of sour cream for extra tang.
These variations let you customize the cheese ball while keeping its classic appeal.
How to Serve This Creamed Chipped Beef Cheese Ball
Serve the cheese ball slightly chilled but not ice-cold for the best spreading texture.
Place it on a serving platter with a small cheese knife or spreader. Garnish with extra chopped green onions for color and freshness.
Surround it with crackers so guests can easily help themselves without crowding the table.
Serving Suggestions That Pair Perfectly
While Ritz crackers are a classic choice, this cheese ball pairs beautifully with a variety of dippers.
Try butter crackers, wheat crackers, pretzel crisps, or toasted baguette slices. Fresh vegetable sticks like celery, bell peppers, and cucumber also work well and add a lighter contrast.
For a party spread, pair it with olives, pickles, and other finger foods.
Perfect Occasions for This Classic Appetizer
This Creamed Chipped Beef Cheese Ball fits almost any occasion. It’s a staple for holidays like Christmas and Easter, a favorite for game days and Super Bowl parties, and a reliable option for potlucks and family gatherings.
Because it’s affordable, easy, and universally loved, it’s often the first appetizer to disappear from the table.
Time Breakdown: Prep, Chill, and Total Time
One of the best things about this recipe is how little time it takes. Prep time is about 10–15 minutes, depending on how quickly you chop the ingredients.
Chilling time is a minimum of 20 minutes, though longer is fine. Total time from start to finish is under 40 minutes, making it an ideal last-minute appetizer that still feels thoughtful and homemade.