Introduction
Few things in the kitchen are as comforting as the smell of freshly baked bread. The warm, slightly sweet aroma that fills your home as bread bakes in the oven is enough to make anyone feel cozy and hungry at the same time.
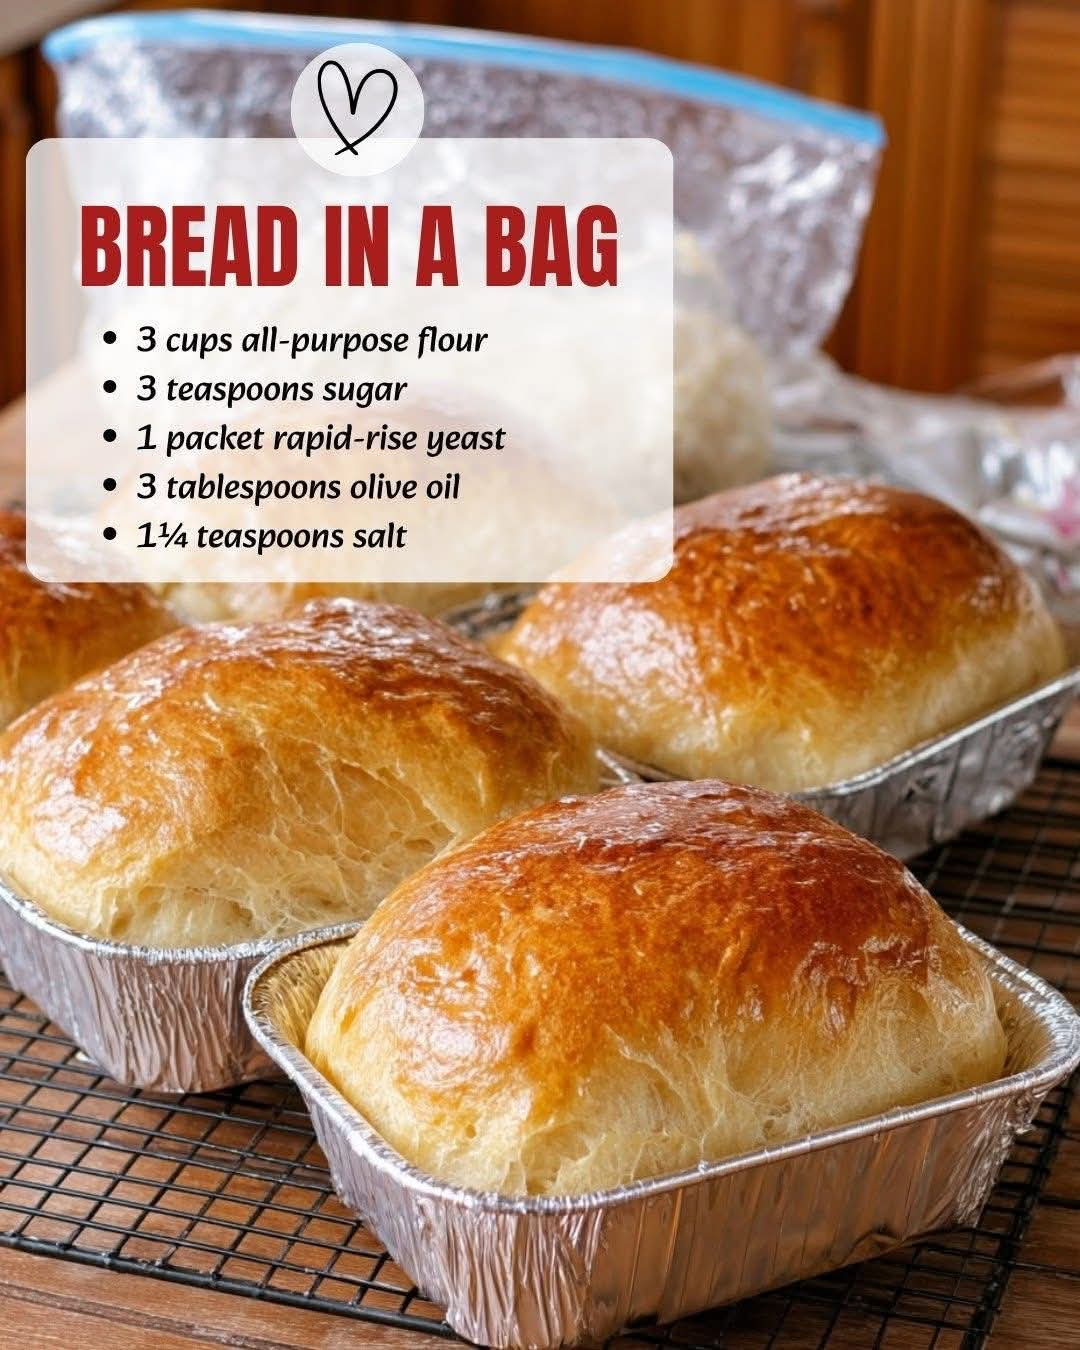
But many people believe that baking bread at home is complicated, messy, and time-consuming. That’s exactly why Bread in a Bag is such a fantastic recipe. It simplifies the entire bread-making process while still delivering delicious homemade results.
Bread in a Bag is a fun and incredibly easy method for making fresh bread without the usual mess of mixing bowls and dough-covered countertops. Instead of kneading the dough by hand on a work surface, everything is mixed right inside a resealable bag. This method keeps your kitchen clean and makes the process approachable for beginners, kids, or anyone who wants a quick and simple homemade bread recipe.
This recipe uses basic pantry ingredients like flour, yeast, sugar, salt, and olive oil. With just a little mixing, some rising time, and a short bake in the oven, you’ll have soft, fluffy mini loaves that taste far better than store-bought bread. The texture is light and tender with a beautifully golden crust.
Another reason people love this recipe is how interactive it is. Squishing and mixing the dough inside the bag is not only practical but also surprisingly fun. It’s a great activity to do with family members or children who want to help in the kitchen.
Whether you’re new to baking or simply looking for an easy bread recipe that doesn’t require special tools, Bread in a Bag is a perfect choice. It’s simple, satisfying, and delivers wonderful homemade bread every time.
Why This Recipe Works
This Bread in a Bag recipe works so well because it simplifies traditional bread-making techniques without sacrificing quality or flavor. The ingredients are carefully balanced to produce a soft dough that rises beautifully and bakes into light, fluffy loaves.
One of the key reasons this recipe succeeds is the use of rapid-rise yeast. Unlike traditional yeast, rapid-rise yeast activates quickly and helps the dough rise faster. This cuts down on preparation time while still creating a soft, airy crumb.
The bag-mixing technique also contributes to the recipe’s success. By sealing the ingredients inside a sturdy plastic bag, you create a contained space where the flour, yeast mixture, and oil can combine evenly. This prevents flour from spilling everywhere and allows the dough to develop properly without excessive handling.
Olive oil plays another important role in this recipe. It helps keep the bread soft and tender while adding subtle flavor. The oil also improves the texture of the dough, making it easier to shape into loaves after the first rise.
Additionally, the two-stage rising process ensures a light and airy bread. The first rise allows the yeast to activate fully and develop flavor, while the second rise helps the shaped loaves become fluffy before baking.
Finally, baking the bread at the right temperature ensures the loaves develop a golden crust while staying soft on the inside. The result is a batch of beautiful mini loaves with a perfect balance of texture and flavor.
What You’ll Need For This Recipe
One of the best parts about Bread in a Bag is that it requires only a handful of simple ingredients that most people already have in their kitchen.
You will need rapid-rise yeast, which helps the dough rise quickly and reliably. Warm water is used to activate the yeast and start the fermentation process.
All-purpose flour forms the base of the dough and provides the structure needed for the bread to hold its shape. A small amount of granulated sugar feeds the yeast and gives the bread a subtle hint of sweetness.
Fine sea salt enhances the overall flavor of the bread and balances the sweetness from the sugar. Olive oil adds moisture, tenderness, and a mild richness to the finished loaves.
You’ll also need a heavy-duty gallon-sized resealable freezer bag for mixing the dough, along with small loaf pans for baking the shaped dough.
With just these basic ingredients and tools, you can create soft and delicious homemade bread with minimal effort.
Ingredient Notes
Each ingredient in this recipe plays a specific role in creating the perfect loaf of bread.
Rapid-rise yeast is designed to work quickly, making it ideal for beginner bread recipes. If you only have active dry yeast, you can still use it, but the rising times may be slightly longer.
Warm water is essential for activating the yeast properly. The temperature should be between 105°F and 115°F. If the water is too hot, it can kill the yeast, and if it’s too cold, the yeast may not activate fully.
All-purpose flour works perfectly for this recipe, providing structure while still allowing the bread to remain soft and tender.
Sugar is not used to sweeten the bread significantly but rather to feed the yeast and help it grow.
Salt is essential for flavor and also helps control the yeast activity so the dough rises at the right pace.
Olive oil contributes moisture and softness while adding a subtle depth of flavor.
Kitchen Tools You’ll Need
This recipe requires very few kitchen tools, which makes it perfect for beginner bakers or anyone who wants to keep things simple.
A small mixing bowl is needed for activating the yeast with warm water and sugar.
The most important tool is a heavy-duty gallon-sized resealable freezer bag. This bag acts as your mixing bowl and kneading surface at the same time.
You will also need four small loaf pans or similar baking dishes for shaping and baking the mini loaves.
A baking sheet is helpful for placing the loaf pans in the oven and ensuring even baking.
Finally, a cooling rack is useful for letting the bread cool properly after baking.
How To Make This Recipe
Making Bread in a Bag is a surprisingly simple process that eliminates many of the steps typically associated with traditional bread baking.
First, the yeast is activated by mixing it with warm water and sugar. Once the yeast becomes foamy and bubbly, it is ready to be combined with the other ingredients.
The flour and salt are added directly into a resealable bag and gently shaken to distribute the ingredients evenly.
Next, the activated yeast mixture and olive oil are poured into the bag. The bag is sealed tightly, and the dough is mixed by squeezing and kneading the bag from the outside.
After a few minutes of mixing, the dough will form a shaggy but cohesive mass. The bag is then sealed again and placed in a warm spot to rise.
Once the dough doubles in size, it is shaped into small loaves, allowed to rise again, and then baked until golden brown.
Step-by-Step Cooking Instructions
Start by activating the yeast in warm water and sugar. Allow the mixture to sit for several minutes until it becomes foamy.
Place the flour and salt inside a resealable bag and shake gently to combine.
Pour the yeast mixture and olive oil into the bag with the dry ingredients.
Seal the bag tightly and mix the dough by squishing and squeezing the bag until everything is fully combined.
Let the dough rise in the sealed bag for about 45 to 60 minutes until doubled in size.
Punch down the dough, transfer it to a lightly floured surface, and divide it into four portions.
Shape each portion into a small loaf and place them in greased loaf pans.
Allow the loaves to rise again until they look puffy and airy.
Bake in a preheated oven at 375°F for 20 to 25 minutes until golden brown.
Cool slightly before removing from the pans and transferring to a wire rack.
Tips + Tricks For Recipe Success
Always check the temperature of your water before adding yeast. Water that is too hot can prevent the yeast from working properly.
Use a sturdy freezer bag to avoid tearing during the mixing process.
If the dough feels too sticky, add a small amount of flour while shaping the loaves.
Allow both rising stages to happen in a warm place for the best results.
Common Mistakes To Avoid
One common mistake is using water that is too hot when activating the yeast. This can kill the yeast and prevent the dough from rising.
Another mistake is skipping the second rise. This step is essential for creating light, fluffy bread.
Overbaking can also cause the bread to become dry, so be sure to remove the loaves once they reach a golden brown color.
Flavor Variations
This recipe is extremely versatile and can easily be customized.
You can add dried herbs like rosemary or thyme to the dough for a savory twist.
Shredded cheese can be mixed into the dough for cheesy bread.
Garlic powder or onion powder can also be added to enhance the flavor.
For a slightly sweeter bread, try adding honey instead of sugar.
Storage Tips
Homemade bread tastes best fresh, but it can also be stored for later.
Keep the bread in an airtight container at room temperature for up to two days.
For longer storage, wrap the loaves tightly and freeze them for up to two months.
When ready to eat, simply thaw and warm the bread in the oven for a few minutes.
How To Serve This Recipe
Bread in a Bag can be served in many delicious ways. The soft interior and light crust make it perfect for slicing and spreading with butter.
It can also be used to make sandwiches, toast, or served alongside soups and stews.
Because the recipe produces mini loaves, they are ideal for sharing at family meals or gatherings.
Serving Suggestions
Serve warm slices with butter, jam, or honey for a simple and satisfying snack.
Pair the bread with soups like tomato soup or vegetable soup for a comforting meal.
You can also serve it with olive oil and balsamic vinegar as a dipping bread.
For breakfast, toast slices and top them with avocado or scrambled eggs.
Time, Yield, and Nutrition Overview
This recipe is quick and easy compared to many traditional bread recipes.
The total preparation time is about 20 minutes, with around 1 hour and 30 minutes for rising and baking.
The recipe yields four small loaves, making it perfect for families or small gatherings.
Each loaf has a soft interior, a golden crust, and a delicious homemade flavor that makes it far better than store-bought bread.
Bread in a Bag proves that homemade bread doesn’t have to be complicated. With a few simple ingredients and a fun mixing method, anyone can enjoy warm, freshly baked bread right from their own kitchen. 🍞