1. Introduction to Zesty Lemon Meringue Pie Cannolis
Zesty Lemon Meringue Pie Cannolis are an irresistible fusion dessert that combines the best of two worlds: the tart brightness of a classic lemon meringue pie and the crispy elegance of a traditional Italian cannoli.
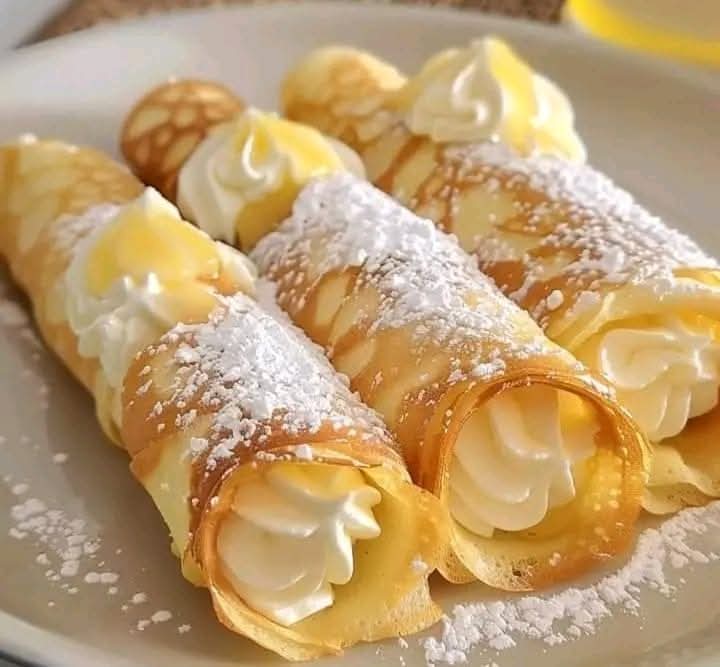
The moment you bite into one of these delightful pastries, you’re greeted with a golden, flaky shell packed with silky lemon filling that tastes like sunshine wrapped in pastry. It’s a dessert that feels fresh, bold, and sophisticated—yet surprisingly simple to make at home.
This recipe is especially appealing because it brings a fun, creative twist to familiar flavors. Instead of assembling an entire lemon meringue pie, you transform those beloved elements into individually portioned cannolis that are easier to serve, easier to transport, and far more striking on a dessert platter.
These cannolis are light enough for spring and summer, yet rich and comforting enough to enjoy year-round. Whether you’re making them for a family gathering, a special event, or a casual afternoon treat, they never fail to impress.
In this complete guide, you’ll learn why this recipe works so beautifully, what ingredients you need, how to prepare each component, the best expert tips, how to serve them, creative serving suggestions, timing estimates, troubleshooting help, and more. With 14 sections of detailed breakdowns, you’ll have everything you need to create perfect Zesty Lemon Meringue Pie Cannolis from start to finish.
2. Why This Recipe Works
This recipe succeeds for several important culinary reasons. Each ingredient and method contributes to the final texture, flavor, and presentation. Understanding these elements helps ensure your cannolis turn out consistently perfect every time.
A Perfect Shell Substitute
Traditional cannoli shells are fried and require a bit of effort, but this recipe uses store-bought pie dough instead. Pie crust turns beautifully crispy and golden in the oven, offering that satisfying crunch without the mess and time required for deep frying.
Light, Creamy, Tangy Filling
The filling is a balanced blend of lemon curd, marshmallow fluff, and whipped topping. The lemon curd delivers bright citrus notes, while the marshmallow fluff mimics the sweetness and airy texture of a classic meringue. The whipped topping brings smoothness and stability, creating a dreamy filling that holds its shape.
Beginner-Friendly Technique
No special pastry-making skills are required. If you can wrap dough around a metal cannoli form, whisk filling ingredients together, and pipe a creamy mixture, you can master this recipe.
Reliable Texture Every Time
Because the filling isn’t cooked and the shells are baked rather than fried, this recipe avoids the common pitfalls of soggy shells, runny filling, or overly heavy textures.
3. What You’ll Need for This Recipe
Gathering all your ingredients before starting helps the process run smoothly. Here’s everything required to make these bright, lemony cannolis.
For the Cannoli Shells
2 (9-inch) round pie dough circles: Pre-made crusts like Pillsbury Pie Crusts create consistent results.
1 egg: Used to seal the dough around the cannoli form.
1 teaspoon water: Combined with egg to make an effective egg wash.
For the Filling
¾ cup lemon curd: Provides tart, vibrant citrus flavor.
½ cup marshmallow fluff: Mimics the sweetness and airy texture of meringue.
1 cup frozen whipped topping, thawed: Creates a light, creamy, stable filling.
1 teaspoon fresh lemon zest (optional): Enhances brightness and adds aromatic lemon oils.
For Garnish
1 teaspoon powdered sugar: Adds an elegant finishing touch and a little sweetness.
Equipment Needed
Metal cannoli forms
Parchment-lined baking sheet
Mixing bowls
Pastry brush
Piping bag (or a zip-top bag with the corner snipped)
4. Preparing for Baking: Setting Up for Success
Before you start cutting dough or mixing filling, proper preparation ensures smooth execution. Here’s how to get ready.
Thaw your pie dough for about 10 minutes so it becomes pliable without becoming sticky.
Preheat the oven to 425°F (218°C) so the shells bake evenly and quickly.
Spray metal cannoli forms with non-stick spray to ensure easy removal after baking.
Clear a workspace to roll and cut dough circles.
Line a baking sheet with parchment to prevent sticking and ensure easy cleanup.
This stage may seem simple, but proper setup often determines the final quality of your pastries.
5. How to Make Zesty Lemon Meringue Pie Cannolis (Step-by-Step)
This recipe includes several easy stages. Follow them closely for the best results.
Step 1: Prepare the Oven and Pan
Preheat your oven to 425°F (218°C). Allow your refrigerated pie dough to soften slightly for easier handling.
Spray 8 metal cannoli tubes lightly with non-stick spray so the shells can slide off once baked.
Step 2: Create the Shells
On a lightly floured surface, unroll your pie dough circles. Using a round cutter or bowl, cut four 4 ½-inch circles from each crust.
Whisk your egg with 1 teaspoon of water to create an egg wash.
Wrap each dough circle around a cannoli form, brushing a little egg wash on the overlapping edge to seal the seam.
Step 3: Freeze and Bake
Place the dough-wrapped forms in the freezer for 10 minutes. This helps the dough keep its shape as it bakes.
Transfer to a parchment-lined baking sheet and bake for 10–12 minutes, or until beautifully golden.
Let the shells cool completely before gently sliding them off the metal forms.
Step 4: Prepare the Filling
In a medium bowl, combine:
Lemon curd
Marshmallow fluff
Once smooth, fold in the whipped topping and lemon zest (if using).
Refrigerate the filling while you wait for the shells to cool.
Step 5: Assemble
Transfer the filling to a piping bag. Pipe into both ends of the cooled cannoli shells until filled.
Step 6: Add the Finishing Touch
Dust with powdered sugar right before serving to maintain that fresh, snowy look.
6. Tips + Tricks & More for Recipe Success
Tip 1: Use Cold Dough
Slightly chilled pie crust holds its shape better and browns more evenly.
Tip 2: Don’t Skip Freezing
Freezing prevents the dough from sliding or puffing unevenly during baking.
Tip 3: Seal the Edges Well
The egg wash not only helps the dough stick but also adds a lovely golden sheen.
Tip 4: Let Shells Cool Completely
Warm shells can collapse or melt the filling. Patience pays off!
Tip 5: Use High-Quality Lemon Curd
The flavor of your filling rests heavily on your lemon curd. Choose a brand with fresh, real lemon flavor, or use homemade.
Tip 6: Fold, Don’t Stir
When combining the whipped topping, gently fold to maintain its airy structure.
Tip 7: Fill Just Before Serving
Filling too early softens the shells. For best crunch, fill within 1 hour of serving.
Tip 8: Customize with Mix-Ins
Add micro-meringues, candied lemon peel, or crumbled cookies for texture variation.
7. Troubleshooting: Common Issues & Fixes
Even with simple recipes, small issues can arise. Here’s how to fix or prevent them.
Shells Cracking
Dough may be too cold—let sit on the counter for a few minutes before wrapping.
Shells Sticking to Forms
Add a light coating of non-stick spray before wrapping the dough.
Filling Too Runny
Refrigerate longer, or add more whipped topping for structure.
Cannoli Shells Losing Their Crunch
Fill closer to serving time, or store shells separately from filling.
8. Variations You Can Try
Berry Lemon Cannolis
Add chopped fresh berries or a swirl of berry purée into the filling.
Toasted Coconut Lemon Cannolis
Roll edges in toasted coconut flakes.
White Chocolate Lemon Cannolis
Dip the ends of the baked shells in melted white chocolate.
Super Tart Version
Add extra lemon zest or 1–2 tablespoons of fresh lemon juice.
9. Storing Your Lemon Meringue Pie Cannolis
Storing the Shells
Keep plain shells in an airtight container at room temperature for up to 3 days.
Storing the Filling
Refrigerate for 2–3 days in a covered bowl.
Storing Assembled Cannolis
Best eaten within 2–4 hours, but will keep up to 24 hours refrigerated (though shells soften).
10. How to Serve Zesty Lemon Meringue Pie Cannolis
Serving these cannolis can be as simple or elegant as you like:
Serve directly on a dessert platter with a dusting of powdered sugar.
Place them chilling in the fridge for a cool, refreshing bite.
Add lemon zest curls for flair.
Dust lightly with powdered sugar right at the last minute for picture-perfect presentation.
The bright filling and crispy shell combine to create a refreshing, delightful dessert experience ideal for any celebration.
11. Serving Suggestions for Any Occasion
For Parties
Arrange cannolis on a tiered dessert stand with lemon slices and mint sprigs.
For Brunch
Serve alongside fresh berries, yogurt, and iced tea.
For Summer Gatherings
Pair with:
Iced lemonade
Sparkling wine
Citrus-infused water
For Fancy Dinners
Drizzle raspberry coulis or white chocolate on the plate before placing the cannoli.
For Kids
Skip the powdered sugar and add colorful sprinkles to the ends.
12. Perfect Timing for This Recipe
Here’s the full timing breakdown:
Prep time: 20 minutes
Freeze time: 10 minutes
Bake time: 10–12 minutes
Cooling time: 20–30 minutes
Filling prep: 5 minutes
Assembly: 10 minutes
Total Estimated Time: About 1 hour and 15 minutes
13. Why Lemon Meringue and Cannolis Are the Perfect Match
The combination may seem unexpected, but lemon meringue pie and cannolis pair beautifully for these reasons:
Lemon curd adds vibrant acidity that cuts through sweetness.
Marshmallow fluff provides the meringue-like texture without requiring baking.
Whipped topping adds silkiness and body.
Pie-crust cannoli shells bring buttery crispness, complementing the airy filling.
This dessert strikes a gorgeous balance of rich and light, sweet and tart.
14. Final Thoughts: A Bright, Beautiful Dessert Worth Making
Zesty Lemon Meringue Pie Cannolis are a joyful fusion dessert that brings a modern twist to two beloved classics. With their golden, flaky shells and luscious lemon filling, they offer elegance without complexity. The recipe is approachable enough for beginners yet impressive enough for professional-level presentation.
Whether you’re preparing them for a summer party, a family celebration, or simply a treat-yourself moment, these cannolis deliver sunshine in every bite. The bright lemon filling contrasts beautifully with the buttery crunch of the shells, while the soft marshmallow fluff and whipped topping provide a cloud-like finish.
With proper timing, simple preparation, and helpful tips, you’ll create show-stopping cannolis that look stunning and taste unforgettable. Once you try them, they’re almost guaranteed to become one of your go-to desserts. Enjoy every zesty, creamy, crispy bite!