Classic Christmas Treats – A Festive, No-Bake Holiday Favorite
Christmas is a season filled with comfort, joy, and nostalgic flavors that remind us of childhood magic. Among the many treats traditionally shared during the holidays, few are as colorful, cheerful, and delightfully simple as Classic Christmas Treats.
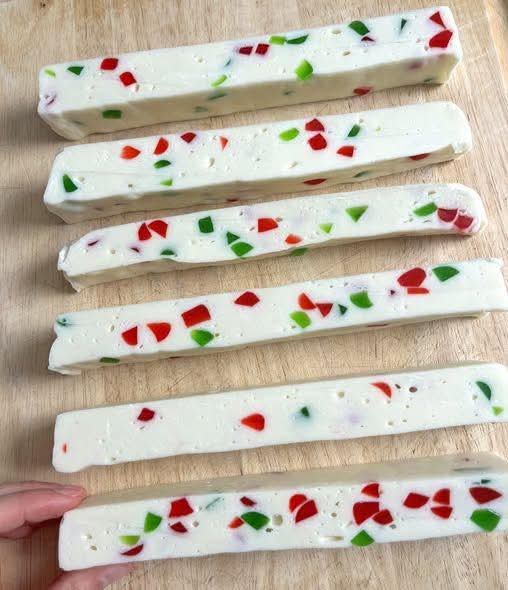
Made with white chocolate, marshmallows, and brightly colored gumdrops, this recipe turns a handful of everyday ingredients into a whimsical confection that looks like it belongs in Santa’s workshop.
Whether you’re preparing a holiday dessert tray, making edible gifts, or creating a fun kitchen project for the family, this no-bake recipe is guaranteed to add sparkle to the festivities.
These treats strike the perfect balance between creamy, chewy, and sweet, with just the right pop of color to brighten any dessert table.
And because they require no stove or oven time, they’re ideal for busy December days when the schedule is packed but you still want something homemade and heartwarming. Let’s dive deeper into what makes this recipe work, how to create it effortlessly, and how to serve it beautifully.
Why This Recipe Works So Beautifully
This recipe succeeds for several reasons, starting with its smart combination of ingredients.
White chocolate and butter melt into a silky base that creates rich flavor and a perfectly smooth texture.
Mini marshmallows add body and chewiness while helping the mixture set firmly without becoming rock-hard. The gumdrops—bright reds and greens, ideally—deliver pops of fruitiness and holiday charm.
Another reason this recipe works is its simplicity. Every step is designed to be accessible, even for beginners or young kitchen helpers.
Since all the mixing happens in one bowl and the microwave does the heavy lifting, cleanup is minimal, making this treat as convenient as it is delicious.
Finally, the recipe is customizable. You can swap the gumdrops for other chewy candies, colored sprinkles, or festive M&Ms.
You can make the squares thicker or thinner, add extracts like peppermint, or create themed versions for other holidays. That flexibility ensures this becomes a classic you’ll return to again and again.
What You’ll Need for This Festive Recipe
This recipe uses simple, pantry-friendly ingredients that come together quickly:
Butter (2 tbsp) – Helps the chocolate melt smoothly and keeps the texture soft.
White chocolate chips (12 oz / 1 bag) – Forms the base of the treat, adding sweetness and creaminess.
Mini marshmallows (10 oz / 1 bag) – Provide structure, chew, and the classic “fluff” effect.
Red and green gumdrops or chewy candy, chopped (1 cup) – Add bursts of fruity flavor and vibrant holiday color.
No specialty equipment is required—just a microwave-safe bowl, spatula, sharp knife, and an 8×8-inch dish lined with parchment paper.
How to Make Classic Christmas Treats: Step-by-Step
This is a wonderfully simple recipe that even kids can help with. Here’s how to make it:
Step 1: Prepare the Dish and Melt the Ingredients
Start by lining an 8×8-inch baking dish with parchment paper. Leave some overhang so you can easily lift the treats out later. Lightly grease the paper to keep the mixture from sticking.
In a large microwave-safe bowl, combine the butter, white chocolate chips, and mini marshmallows. Microwave for 1 minute, then stir. Continue microwaving in 30-second intervals, stirring between each, until everything is melted and completely smooth.
The mixture should be creamy with no visible lumps. Take care not to overheat—white chocolate burns quickly.
Step 2: Fold in the Candy
Allow the mixture to cool for about one minute so the gumdrops don’t melt. Then add the chopped red and green candies, gently folding them in until they’re evenly distributed. The bright colors will peek through the mixture like Christmas lights in snow.
Step 3: Spread and Chill
Pour the mixture into the prepared baking dish and use a spatula to smooth it into an even layer. Cover the dish with plastic wrap and refrigerate for at least 4 hours—overnight is even better if you prefer a firmer texture.
Step 4: Slice and Store
Once chilled, lift the entire block from the pan using the parchment paper. Remove the paper, place the block on a cutting board, and slice into cubes or rectangles.
Store your Classic Christmas Treats in an airtight container to keep them fresh and soft. They’ll last up to one week in the refrigerator.
Tips + Tricks for Recipe Success
To help your treats turn out perfect every time, here are several practical tips:
Don’t overheat the white chocolate.
Melt slowly and stir often—burned chocolate becomes grainy.
Let the mixture cool slightly before adding candy.
This prevents the gumdrops from melting into the base.
Use parchment paper with overhang.
This makes lifting and slicing incredibly easy.
Grease the spatula.
Lightly coating your spatula with butter or oil keeps the sticky mixture from clinging.
Chill long enough.
The squares need at least 4 hours to fully firm.
Chop the gumdrops small.
Smaller pieces make every bite colorful and easier to slice.
Use a sharp knife.
A clean, sharp blade ensures neat squares.
Variations for Fun and Creativity
Want to personalize your Christmas treats? Here are some festive ideas:
Swap gumdrops for holiday M&Ms.
Add ½ teaspoon peppermint extract for a candy-cane twist.
Stir in crushed pretzels for salty-sweet balance.
Sprinkle the top with festive nonpareils before chilling.
Use dried cranberries for a tangier, gourmet version.
Make-Ahead and Storage Tips
These treats are perfect for holiday schedules because they can be prepared well in advance.
Make ahead: Prepare them up to 3 days before serving.
Storage: Keep in an airtight container in the refrigerator for 7 days.
Freezing: Freeze for up to 2 months; thaw in the refrigerator before serving.
How to Serve Classic Christmas Treats
These colorful squares look beautiful on a holiday dessert table. Serve them:
On a Christmas platter with cookies and fudge
Wrapped in cellophane bags for gifts
As part of a festive classroom or office treat box
In small paper cups for portion control
Alongside hot cocoa or peppermint coffee
Cut the squares small—they are rich, sweet, and satisfying!
Serving Suggestions for a Complete Christmas Dessert Spread
Here are delicious ways to incorporate these treats into your holiday celebrations:
Pair them with gingerbread cookies and sugar cookie bars for a cheerful cookie tray.
Add them to a hot cocoa bar as a fun candy option.
Include them in a homemade gift basket with cocoa mix, peppermint bark, and marshmallow pops.
Place them beside classic fudge or peanut butter balls for a traditional Midwestern-style candy assortment.
Their bright colors and soft-chewy texture make them a standout on any dessert table.
Time Required to Make This Recipe
Here’s a quick breakdown of the timing:
Prep Time: 10 minutes
Microwave Melting Time: 1–3 minutes
Cooling Time Before Candy: 1 minute
Chill Time: 4 hours minimum
Total Time: About 4 hours, 15 minutes
Almost all of this is hands-off, making it perfect for busy holiday baking days.
Why These Christmas Treats Are Perfect for Gifting
Homemade gifts are always more meaningful, and these treats are ideal because:
They package well in small boxes or bags.
They hold their shape and freshness for days.
Their bright colors make them naturally festive.
They’re simple and budget-friendly to make in large batches.
Add a ribbon, a cute tag, and you have a wonderful homemade present.
Kid-Friendly and Family-Friendly Fun
This recipe is extremely kid-friendly:
No stovetop or oven required
Simple, colorful ingredients
Quick melting and mixing steps
Fun cutting and tasting moments
It’s a great December activity for families, classroom parties, or weekend baking traditions.
Final Thoughts on Classic Christmas Treats
Classic Christmas Treats capture everything magical about the holiday season: sweetness, color, nostalgia, and togetherness.
With a simple list of ingredients and minimal effort, you can create a dessert that brightens every celebration.
Whether enjoyed on Christmas Eve, shared at a party, or wrapped as a heartfelt homemade gift, these chewy and colorful squares are sure to become a beloved tradition.