Intro
If you’re looking for a wholesome, flexible, and family-friendly baked treat, Baked Oat Bars (1) are a wonderful place to start. These bars strike the perfect balance between nutritious and comforting, making them ideal for busy mornings, lunchboxes, or an afternoon snack with a cup of tea.
With simple pantry staples and endless customization options, Baked Oat Bars (2) easily fit into everyday life without feeling boring or repetitive.
What makes this recipe especially appealing is how approachable it is. You don’t need fancy equipment, advanced baking skills, or hard-to-find ingredients.
Everything comes together in one bowl, bakes in under half an hour, and slices neatly once cooled. Whether you’re baking for kids, meal-prepping for the week, or just craving something cozy, these oat bars deliver comfort and reliability in every bite.
Why This Recipe Works
The success of Baked Oat Bars (3) comes from a carefully balanced combination of dry and wet ingredients that create structure without dryness.
Rolled oats provide heartiness and texture, while flour helps bind everything together so the bars hold their shape once sliced. Baking powder adds just enough lift to keep the bars from feeling dense or heavy.
Another reason Baked Oat Bars (4) work so well is the use of natural sweeteners and moisture-boosting ingredients. Honey or maple syrup brings gentle sweetness, applesauce or mashed banana adds softness, and melted coconut oil or butter ensures a tender crumb.
The egg ties everything together, giving the bars stability without making them cake-like.
Finally, the flexibility of mix-ins is a huge win. Chocolate chips, nuts, dried fruit, or seeds allow you to adapt the recipe to different tastes, seasons, or dietary needs, making it one you’ll return to again and again.
What You’ll Need For This Recipe
To make Baked Oat Bars (5), you’ll only need basic pantry ingredients that are easy to keep on hand. Rolled oats form the base and give the bars their satisfying chew.
All-purpose flour works perfectly, but whole wheat flour can be used for a slightly heartier result.
Baking powder helps the bars rise just enough, while cinnamon adds warmth and subtle spice. Salt may seem minor, but it enhances all the other flavors and balances the sweetness.
For sweeteners, honey or maple syrup provides natural sweetness, with optional brown sugar if you prefer a richer, more dessert-like bar.
Moisture comes from unsweetened applesauce or mashed banana, both of which keep Baked Oat Bars (6) soft without making them greasy.
Melted coconut oil or butter adds richness, while a single egg provides structure. Vanilla extract rounds out the flavor, and your chosen mix-ins bring personality and variety to every batch.
How To Make This Recipe
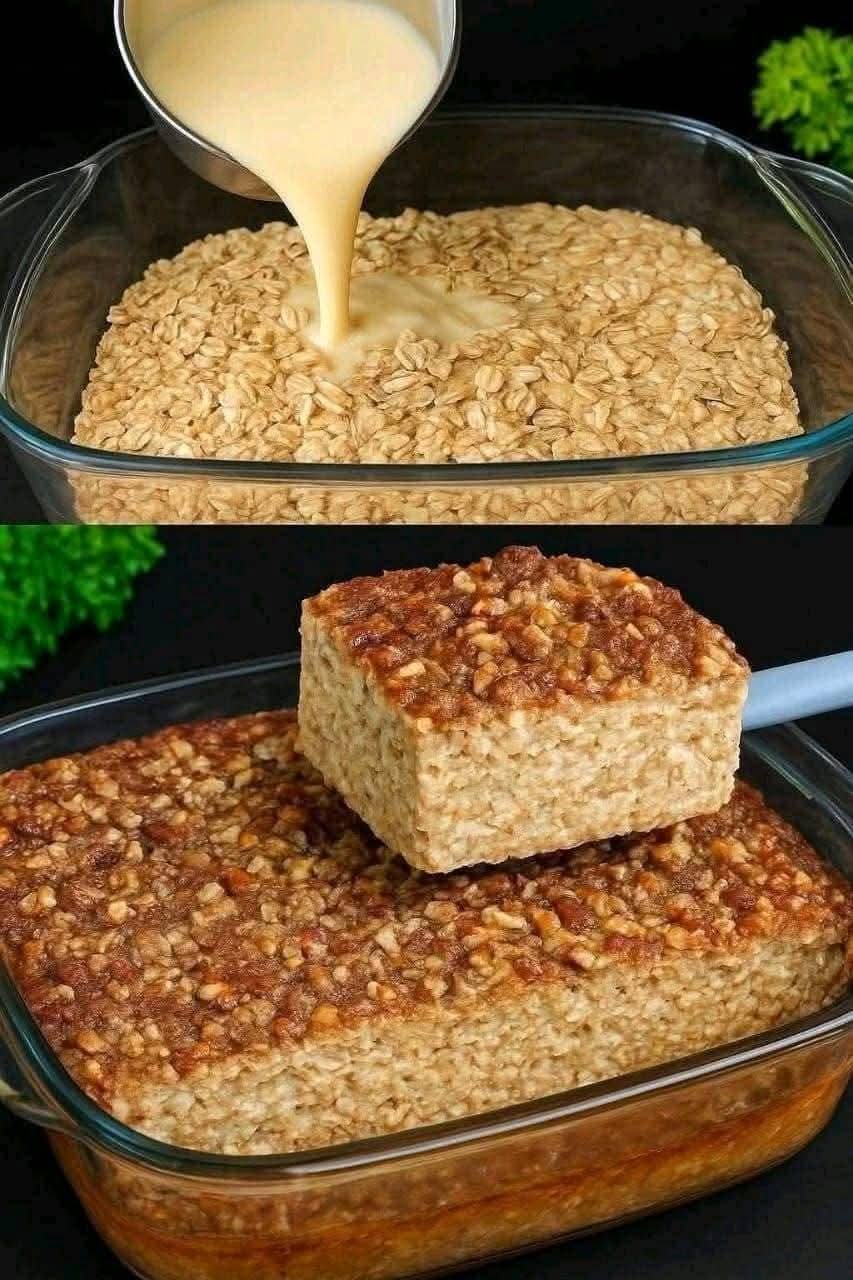
Making Baked Oat Bars (7) is refreshingly simple and doesn’t require any special techniques. Start by preheating your oven to 350°F (175°C) and preparing an 8×8-inch baking pan with parchment paper or a light coating of grease. This ensures easy removal and clean slices later.
In a large bowl, mix all the dry ingredients together: oats, flour, baking powder, cinnamon, and salt. Stir well so everything is evenly distributed. In a separate bowl, whisk together the wet ingredients—honey or maple syrup, brown sugar if using, applesauce or banana, melted oil or butter, egg, and vanilla.
Pour the wet mixture into the dry ingredients and stir gently until just combined. Avoid overmixing, as this can make the bars tough.
Fold in your mix-ins last so they’re evenly spread throughout the batter. Spread the mixture evenly into the prepared pan and smooth the top.
Bake for 25–30 minutes, until the top is golden and the center feels set. Let the bars cool completely before slicing. This step is key for clean cuts and well-defined Baked Oat Bars (8).
Tips + Tricks & More For Recipe Success
For the best Baked Oat Bars (9), use rolled oats rather than quick oats. Rolled oats provide better texture and prevent the bars from becoming mushy. If you prefer a softer bar, slightly increase the applesauce or banana by a tablespoon or two.
Let the bars cool fully before cutting. Warm bars are more likely to crumble, while cooled bars slice neatly and hold together well. If you like firmer bars, refrigerate them for 30 minutes before slicing.
When choosing mix-ins, aim for balance. Too many add-ins can weigh the bars down, while too few may make them feel plain. A combination of chocolate chips and nuts or dried fruit and seeds works especially well.
These small adjustments help ensure your Baked Oat Bars (10) turn out just the way you like them every time.
How To Serve
Baked Oat Bars (11) are incredibly versatile when it comes to serving. They’re delicious on their own, but also pair well with yogurt, fresh fruit, or a drizzle of nut butter. For breakfast, enjoy one alongside a glass of milk or a smoothie for a balanced start to the day.
As a snack, these bars are filling without being heavy, making them great for school lunches or afternoon pick-me-ups. They also work well as a light dessert, especially when warmed slightly and served with a small scoop of vanilla yogurt or ice cream. However you serve them, Baked Oat Bars (12) fit effortlessly into any part of the day.
Serving Suggestions
For variety, cut the bars into smaller squares for snack platters or gatherings. You can also wrap individual bars for easy grab-and-go convenience.
If serving to kids, consider using fun mix-ins like mini chocolate chips or colorful dried fruit to make them more appealing.
For a more grown-up twist, pair the bars with coffee or tea and add chopped nuts or dark chocolate for depth of flavor.
These serving ideas help keep the recipe fresh and exciting, even when you make it often.
Time
One of the biggest advantages of Baked Oat Bars (13) is how little time they require. Preparation takes about 10 minutes, baking takes 25–30 minutes, and cooling takes another 20–30 minutes. From start to finish, you can have a batch ready in about an hour.
Because they store well and freeze beautifully, Baked Oat Bars (14) are perfect for meal prep. Make a batch once, and enjoy easy, homemade snacks all week long with minimal effort.