Classic Homemade Bread: Simple, Soft, and Delicious
Introduction
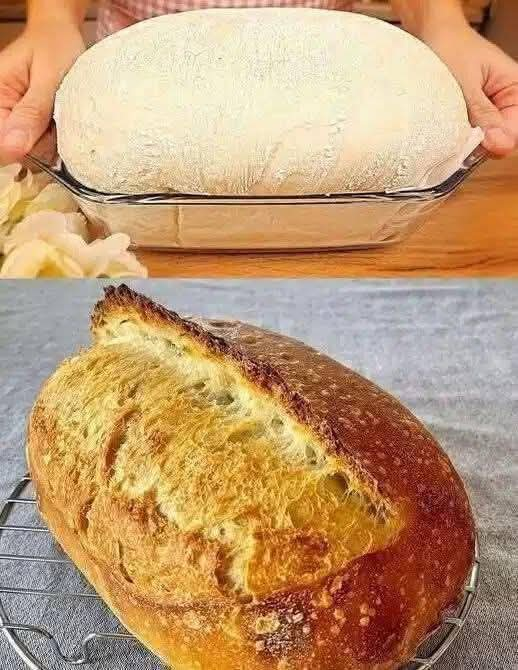
There is something magical about baking Classic Homemade Bread. The smell of freshly baked loaves drifting through the house brings comfort, warmth, and nostalgia like no other. From the first step of mixing the yeast to the final moment of slicing into the golden crust, bread baking is a rewarding ritual that connects us with generations before us.
This Classic Homemade Bread recipe is everything you want in a loaf: soft, fluffy on the inside, with a glossy golden crust on the outside. It’s simple enough for beginners yet satisfying for experienced bakers who want a reliable, foolproof bread recipe. Whether you bake it in a loaf pan for sandwich slices or shape it into a rustic boule, this bread will become a staple in your kitchen.
In this article, we’ll explore not only how to make Classic Homemade Bread step by step but also why this recipe works so well, what you’ll need, helpful tips and tricks, serving ideas, and timing guidance. Let’s dive in!
Why This Recipe Works
The secret to the success of this Classic Homemade Bread lies in the balance of ingredients and the traditional method of bread making. Here’s why it works so well:
Yeast Activation – By dissolving dry yeast in warm water first, we ensure the yeast is alive and ready to work. The frothy sponge guarantees fluffy, risen bread.
Sponge Stage – Mixing a portion of the flour with the yeast water creates a sponge that builds flavor and texture, giving the bread a more complex taste.
Proper Hydration – With carefully measured warm water, the dough stays soft, elastic, and slightly tacky, ensuring tender crumb and chew.
Double Rise Method – Allowing the dough to rise twice ensures maximum volume, light texture, and even crumb structure.
Egg Yolk and Milk Glaze – This final step gives the loaves their golden, glossy finish, making them bakery-quality in both taste and appearance.
This method honors classic bread-baking traditions while being approachable for home cooks. That’s why Classic Homemade Bread works every time.
What You’ll Need For This Recipe
To make Classic Homemade Bread, you only need a handful of pantry staples and a few simple tools.
Ingredients:
Dry Yeast: 10 grams (1 packet)
Warm Water: 200 ml (for yeast) + 400 ml (for dough)
Flour: 720 grams (6 cups) + 120 grams (1 cup for sponge)
Salt: 10 grams (1 teaspoon)
Egg Yolk: 1 (for glaze)
Milk: 1 tablespoon (for glaze)
Equipment:
Large mixing bowl
Wooden spoon or dough whisk
Plastic wrap or clean kitchen towel
Measuring cups and spoons
Stand mixer with dough hook (optional)
Loaf pans (9×5 inch) or baking sheet for round loaves
Pastry brush (for glaze)
Sharp knife or lamé (for slashing loaves)
Wire cooling rack
Having these ready will make preparing Classic Homemade Bread smooth and enjoyable.
How To Make This Recipe
Making Classic Homemade Bread is straightforward but requires patience for rising. Follow these detailed steps for success:
Step 1: Activate the Yeast
Dissolve dry yeast in 200 ml of warm water (about 105–115°F).
Stir and let it sit for 5–10 minutes until frothy.
Step 2: Make the Sponge
Add 120 grams (1 cup) of flour into the yeast mixture.
Mix until smooth and batter-like.
Cover and let it rest for 15 minutes until puffy.
Step 3: Form the Dough
Add the remaining 400 ml of warm water into the sponge.
Gradually stir in 720 grams (6 cups) of flour and salt.
Mix until a shaggy dough forms.
Step 4: Knead the Dough
Knead on a floured surface for 8–10 minutes by hand, or 5–7 minutes in a stand mixer.
Dough should be soft, smooth, and elastic.
Step 5: First Rise
Place dough in a lightly oiled bowl.
Cover and let rise for 1–2 hours, until doubled in size.
Step 6: Shape the Loaves
Punch down the dough to release air.
Divide into two equal portions.
Shape into logs for loaf pans or rounds for boules.
Let rest 10 minutes before final shaping.
Step 7: Second Rise
Place shaped loaves in pans or on a baking sheet.
Cover and rise for 45–60 minutes until puffy.
Step 8: Glaze and Bake
Preheat oven to 375°F (190°C).
Brush tops with egg yolk and milk mixture.
Slash tops (optional) for a professional finish.
Bake for 30–40 minutes, until golden brown and hollow-sounding.
Step 9: Cool Completely
Remove from pans immediately.
Cool on wire rack for at least 1–2 hours before slicing.
Patience at this stage ensures your Classic Homemade Bread has the perfect texture.
Tips + Tricks & More For Recipe Success
Check Your Yeast – If the yeast doesn’t foam, it’s dead. Start fresh.
Mind the Water Temperature – Too hot kills yeast; too cold won’t activate it. Aim for “warm bath water” feel.
Adjust Flour as Needed – Humidity affects dough. If sticky, add flour 1 tablespoon at a time.
Don’t Rush Rising – Bread needs time to develop texture and flavor. Let it rise fully.
Use a Kitchen Scale – For accuracy, weigh flour rather than only using cups.
Add Steam for Crust – Place a pan of hot water in the oven during baking for a chewier crust.
Cool Completely – Cutting too early creates gummy slices. Wait at least 1 hour.
Double Batch for Freezing – Bake two loaves, freeze one tightly wrapped. It keeps well.
Following these tips will guarantee your Classic Homemade Bread turns out bakery-perfect every time.
How to Serve
Classic Homemade Bread is wonderfully versatile. Slice it thick and serve warm with butter, drizzle with honey, or pair with savory spreads like garlic herb butter. It also makes excellent sandwich bread, whether for a BLT, grilled cheese, or simple peanut butter and jelly.
For dinner, serve it alongside hearty soups, stews, or pasta dishes. Tear it apart and dip it into olive oil with balsamic vinegar for an elegant appetizer. However you serve it, this bread elevates the meal.
Serving Suggestions
Here are some creative ways to enjoy Classic Homemade Bread:
Breakfast: Toasted with butter and jam or avocado.
Lunch: Sandwich base for ham, turkey, or vegetarian fillings.
Dinner: Serve with soups like tomato, minestrone, or chicken noodle.
Entertaining: Slice into small cubes for dipping into cheese fondue.
Snack: Spread with Nutella, peanut butter, or hummus.
The soft crumb and golden crust of Classic Homemade Bread make it perfect for every occasion.
Time Required
Making Classic Homemade Bread is a process, but it’s worth every minute.
Yeast activation: 5–10 minutes
Sponge rest: 15 minutes
Mixing & kneading: 10 minutes
First rise: 1–2 hours
Shaping & rest: 10 minutes
Second rise: 45–60 minutes
Baking: 30–40 minutes
Cooling: 1–2 hours
Total Time: 3.5 to 5 hours (mostly hands-off)
While the timeline may look long, most of the time is passive rising or cooling. Active work is about 30–40 minutes total.
Conclusion
Baking Classic Homemade Bread is more than just preparing food—it’s an experience of patience, creativity, and reward. From mixing the sponge to pulling golden loaves from the oven, this recipe delivers consistent results: soft, delicious bread that feels both rustic and refined.
Whether you’re a beginner or seasoned baker, this recipe will become your go-to loaf. Serve it warm, use it for sandwiches, or freeze extra for later. No matter how you enjoy it, Classic Homemade Bread brings comfort and joy to your table every time.